Tuesday, January 11, 2011

New Year orders

Part 2 of Dan's Christmas present was a racing set to go with part 1 (NIB Ruffian). She kindly left the colour choice up to me, so after finding an awesome picture of a yellow bridle on a dark bay (which of course I can't find now), I decide to go with yellow, white and black. But one problem. I don't have enough yellow leather! Oops. So I've ordered it and while waiting for it to arrive, I got started on the saddle.

Dan asked me to make the saddle smaller than my previous one, so out came the paper and pencil. I now have a Smarty Jones tack model (thanks, Lisa!) rather than Ideal, so I think this saddle is more correct.


Above the new pattern is laid over the old; you can see there is more definition in the pommel and the flaps.

Something I had wanted to try after crafting the first saddle for Lisa was a tree of some kind. I didn't like how the first saddle was perpetually flat, and I worried how it would sit on a model with a more defined wither, like Smarty.

I admit I don't know the first thing about trees, or how to attach the leather, or what type of glue to use. This is part of the reason why I've been so reluctant to get into saddles for so long.

Last year I had ordered some aluminium sheets from Oakridge Hobbies, after reading Jennifer Buxton's tutorial on roller buckles. Oakridge had two sizes, 0.008" (which was the size Jennifer recommended for the rollers), and 0.016". I bought both, cause they were cheap (sucker for a bargain), and the larger size might come in useful. That's actually what I used for this saddle's tree.

I traced the pattern onto the tin with permanent texta, then cut it out with regular scissors, making sure it was slightly smaller than the pattern (so it wouldn't show). To get it into shape, I bent the front section into a vague saddle-like shape by pressing it against my cutting mat. The tin is kind of stiff so it took a little bit of effort, and means the saddle shouldn't bend out of shape too easily, but should be able to be shaped to the horse without too much trouble.


Next came the underside leather. For some reason I traced off the tree, not the paper pattern, so I didn't cut flaps. I have durr moments sometimes. :P I added flaps after I glued the tree to the underside leather (after roughing the tree with a nail file and using my trusty Selley's Super Glue gel), and they aren't visible unless you turn the saddle over.


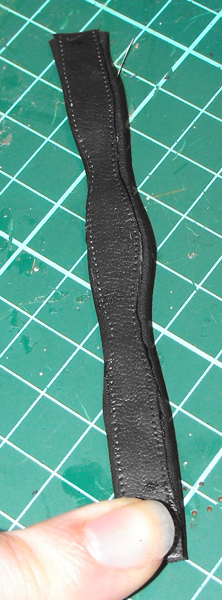
 Next came the attachments for stirrups, and the girth billets.I copied the method I used for Lisa's saddle - two d-rings attached to a strap for the stirrup rings, and one long strap (with a wider strap over the top) to act as girth billets and the buckle protector thing (there's a name for it but its purpose is to cushion the jockey against the girth's buckle).

At this point I also cut the slits for the surcingle (angled up towards the pommel), and threaded the stirrup leathers. Ignore the temporary D-ring stirrups, hehe!


My TWMHC order arrived yesterday, so I was able to add stirrups to the saddle. And here's where we are at the moment: wearing a temporary surcingle while I wait for the yellow leather to arrive! I do need to put trim around the edge of the seat, and on the pommel, too, but that won't take long.


In other news, I have somehow signed myself up to make five harnesses within the next few months. All are traditional, except for one lone classic harness (which is for me). Lisa needs three, and there's a marathon harness for Dan. I can start Dan's harness immediately, as it will be made to fit Ideal, but Lisa's will have to wait until I can go to her place and measure her resins. One of her harnesses may also feature a collar, courtesy of the tutorial in Model Horse Magazine number 8. I really am stepping out! The tutorial sounds pretty easy so I am kind of looking forward to it.

Saturday, December 18, 2010

Eeeeee!

Look what I got in the mail last Friday!


It's my super gorgeous classic Western saddle by the brilliant and talented Erin Corbett!


Just look at all that gorgeous detailing. I regret not ordering a bridle to go with it - I thought I could make a nice bridle to go with it, but now I'm not so sure. The saddle even has adjustable fenders.


The saddle pad is 'army green' by Carrie Sloan Meyer, who kindly agreed to ship it to Erin who then made matching wear leathers for the set.

It's pictured on Felice, whose colouring is not so flattering to the saddle, but it was made for my orange pony Delta who, at the time of these photos, was still in transit back from LITW the previous weekend.


I do want to order another Erin saddle, hopefully next year sometime. I want a sparkle saddle, maybe with a coloured star cut out on the lower skirt. Pretty!

Fast forward a week.

Delta and co arrived back from LITW on Monday, so now I had no excuse not to make a bridle for the Erin saddle. I ummed and ahhed over a design, and really wanted to go with this bridle:


but since I only have two sizes of nail heads in stock, I can't yet work on this style. (I have some 3mm one son order but am still waiting for them to arrive.) I think the concho style on the cheekpieces would suit the saddle as the only silver on it is round conchos. I probably wouldn't put conchos on the browband like in the picture though.

So instead I decided to use some of the other nailheads that arrived recently - the tear drop style. I had seen this style used before but of course couldn't find the reference picture when I needed it, so had to experiment a little before I settled on a design I liked. This is what I ended up with:


I am REALLY thrilled with how this bridle has turned out. The tear drops turned out wonderfully and work well with TWMHC's 1.5mm nailheads. I did think about putting silver tips on the crown but felt that it would be too overwhelming. The saddle is understated in its silver and the bridle should be too.

I used different buckles on this bridle. I usually use the Rio Rondo etched Western buckles, but since I received some cast buckles in a recent purchase, I felt this would be a good time to try them. (I had bought a set of these buckles previously, but at the time I didn't know they had to be polished to bring out the detail.) The keepers are my silver lace, as is the browband (which possibly could be a little longer).

Here is the whole set on Delta, who it was originally made for.


I think she and Skye (above) may be fighting over who gets to she it at the next live show!

Thursday, December 9, 2010

EQ2010 - Driving Obstacles - Singles

Driving is always exciting to watch. This particular event was obstacles - a course made up from pairs of cones to be driving through, and one or two upright obstacles. All obstacles (cones included) have knock-downs - balls placed on top that fall down if knocked. Like in show jumping, faults or points (or time penalties, I can't remember) are given for each ball knocked down. There is also a time limit. Some events split the sizes, but for this particular event the ponies were in with the horses.


Failed project #748

After Christmas shopping a couple of days, I arrived home just as it started to bucket down with rain. It had been a horrible, sticky and humid morning, so the rain was a great relief - and perfect for tack making.

I bummed around for a bit, fiddling with unfinished projects in the too-hard basket, couldn't find anything interesting, and so moved on to the Jennifer's Buxton's English girth tutorial. Except I decided to mix it up a little and not put elastic in.

We all know I can't cut straight to save my life, so a shaped girth (which I have always admired) would be a pretty difficult test for me.

First up, I gathered my tools. Since my leather range is pretty limited, I used a piece of my lace leather offcut for the insert, and glove leather as the skiver. The skiver is a pain in the bum as it doesn't like most glue, I think because it is waterproofed by the tannery it comes from. It sort-of works with Tarzan's grip (a glue I have a love-hate relationship because it tends to go stringy), but only on the underside, so I brought along some super glue (Selley's Quick Fix super glue gel) just in case, as that stuff sticks to anything.


Next came the pattern. My 'home' scale is classic - I just feel more comfortable working in this scale - so I had to design this freehand. I took one of the girths off a Robyn saddle and measured that for length and width, and scribbled (okay, folded and marked) where i thought the curves should begin and end. I didn't (and still don;'t) have any idea, if the proportions are right, but who cares! It's only a practise piece. ;)

I traced the pattern onto the lace leather and cut it out and shaped it, doing my best to make sure the edges are rounded and not vaguely pointy like they always seem to end up with me. Following Jennifer's tutorial, next came the skiver outer. (FYI, Jennifer, if you're reading this, I think there is a step missing in your tutorial. There's a picture with the gum trag, but no description of what to do with it.) Here's where I encountered my first problem. After gluing on the base to the inside of the skiver, I didn't really wait long enough for the glue to dry before folding over the edges, so I couldn't pull it tight. I also think this skiver is too thick, which made the curve not as obvious as it should have been.


While waiting for the skiver to dry, I used the original pattern to cut out the display bit that goes on the outside. Of course, since the skiver made such a different to the shape of the girth, the pattern no longer fit, so I had to round off the edges free hand so it would fit.

My next problem was how to affix the outer pretty section to the skiver edges. Experience tells me that the skiver does not like Duco cement or Tarzan's Grip, so something else was in order. I tried Selley's Craft Glue, but like the Duco Cement, it peeled right off. Something drastic was in order, so out came the super glue. I applied it to the backside of the pretty piece and attached it to the skiver, trying not to glue my fingers to the project.  The downside of the super glue is that it caused the girth to completely stiffen up - albeit in a curved fashion as would fit around a horse's barrel, but still!


I decided to stop here since the project was obviously not able to be rescued, and didn't bother with buckles.  While fiddling with the girth today I did find that by stretching the girth, the glue broke a little inside and it's not so stiff any more, but I don't think super glue is the appropriate type to use with this skiver. So either I need to look into different glues (again), or try and find a different skiver (again).

One step forward, one step back

This halter is really starting to annoy me. I made the changes I had mentioned in my other post that I thought would fix the problem with the wonky cheek pieces (longer noseband, and fixed my leadrope fail too), and even added in an adjustable throatlatch, as I thought that may have been part of the problem. But see for yourself.

The left side looks okay...


But the right side is still wonky!


I have a couple of theories. One, the throatlatch is part of the problem. I used a thicker gauge wire than I normally do (26 gauge), as I think the 26 gauge makes too-thin a roll for traditionals. The wire I did use is some kind of household wire as that's all I had, but as well as being thicker, it's also stiffer and harder to bend. So there are two problems with this. It's difficult to refit to the horse's head, and obviously isn't as flexible.

The other issue with the throatlatch in general is that I'm beginning to think it is just a touch too long. I did make the throatlatch, cheekpieces (with three tubes) and noseband when I only had Ideal to use as a model, so I think that is part of the reason the thrlatch is too long as Ideal has a bit of a chunky head.

My other theory is that when I did the beading on this bridle, the bottom row on the right side came out a bit looser, which is why it hangs that way when it's on the horse. Bah!

I'm getting so frustrated with this halter. I think I will put it in the too-hard basket and move on from it.

Look what I got in the mail yesterday!


More supplies - finally! Not quite sure what Aus Post quarantine found so scary in there, since the other things quarantine doesn't like is animal and plant products. Maybe it was the paper? :P For what it's worth, quarantine doesn't seem to like the UK - I've ordered from there a few times and had packages opened. Oh well - the important bit is that they didn't remove anything - I would have raised fuss if they did!

This is the ebay order of hotfix nailheads, which included a few various sizes. As well as the ubiquitous round nailheads, I also picked up some square (pictured on the beaded halter above), tear drop and rectangle ones.

I am still waiting for another nailhead from the UK (different seller), and wonder if that too has been caught up in quarantine...

Sunday, December 5, 2010

Beaded Western show halter

So, let's take a break from the pretty ponies at Equitana to have a look at my latest project. This is a beaded halter, using those sterling silver beads I found on eBay and that I mentioned a few posts down. I had originally made this with three tubes on the cheek pieces, but when I tried the then partially-completed halter on Lady Phase, it was clear that I had made it way too big. So out came the needle and thread and I completely redid the cheek pieces with two tubes. (I don't have pictures of the in-between halter, so this is the finished piece as of today)


I also had to redo the crownpiece to be shorter than the working one I had been using most of the time. Looking at these pictures (there has been no adjustment or movement between the two pictures), I can see some other areas that need work:


1) The noseband is too short, and needs to be lengthened by 5mm or so. 2) The method I am using (cotton thread) for the beaded cheek pieces isn't working - they only hold the straight line when held tightly and/or at the right angle. When not at the right angle, the beads sag. (Looking at these pictures, I wonder if it is the short noseband that is affecting how the cheek pieces are sitting.) I also think the chain needs to be lengthened just a touch, too.

So I think my next attempt will be with wire instead of thread for the beads. I've no idea how this will hold up - more super glue may be in order.

Dan is at a live show with Riff Raff and some of my proxies today. To keep my mind off it I decided I should probably take my new camera for a proper spin and try some pony pictures. The only model of mine that really needs pictures at the moment is my Far Ute Keno. (I'm keeping the mare from the set, but she is being proxied by Dan at the moment.) Since Keno fits my classic QH mare bridles, I was hoping he would fit the halter too, but no such luck. So three hours later, he finally has a halter.


This halter also has something new - an adjustable connector strap under the head. This was way easier to construct that I thought (I thought it was more like a barcoo bridle cheek piece, but this is just your normal two-piece buckle and strap) so I think all of my Western halters from now on will have one.

In other news, look at what arrived in the mail the other day.


Another hobbyist on MHSP is getting out of the hobby and selling off their supplies. Look at all those classic bits! (I will be going back for her traditional etched bits too.) And as for the saddle tree and stirrups... Well, I'm not quite ready to get into saddle-making yet, but I am building up my supplies for when I am! (Next on the purchase list: paperwork from the Rio Rondo saddle kits)

Wednesday, December 1, 2010

Riff Raff!


So this is Dan's gorgeous Rose Reiner named Riff Raff, who I made boots and reins for last week. He's wearing a lovely Pam Perkins Western saddle and bridle (temporary longer reins by me), splint boots by Robyn McCrae, and no-turn bell boots (which turned before the picture was taken, hehe) by me. There are also skid boots that I made which may or may not be worn in the final set up. (Click the picture for a much bigger version)

This is all for a live show in WA this weekend (which Dan is also proxying a few of my horses at), so I have high hopes Riff Raff will do well!

Sunday, November 28, 2010

EQ2010 - Mounted Games

Omg omg omg. Mounted games are one of my favourite events to watch, particularly at a place like Equitana. To get the crowd involved, they play lots of pumping, active music on the PA and have an enthusiastic commentator, and of course they encourage lots of yelling and cheering! With those ponies flying along like crazy rockets and riders vaulting on and off with speed, it's impossible to get excited. (Note: LOTS of pics below the cut!)


EQ2010 - Driving to Music

Imagine some pretty music while you look through these pictures!


Friday, November 26, 2010

EQ2010 - Breed Parade

The Breed Parade was a half-hour session showcasing a member of a number of different breeds in the outdoor arena. Some horses were led in-hand, and some were ridden. As each horse entered, a small amount of information was read out about the breed. (We saw a full parade and the tail of another, so there may be a couple of different representatives of some breeds.)